how to pattern draft and sew a raglan tee in any size
In today's post: Larn how to make your own raglan sleeve pattern in any size!
Every twelvemonth when it comes time to practise our schoolhouse shopping I'm amazed at how much information technology costs to outfit each kid…and when you have 5, it really adds up! To brand the cost a fiddling less painful I do a lot of thrift store shopping and try to sew a few things using fabrics from my stash. Raglan tees (baseball manner tees) take been very popular for a few years now and they're super easy to sew. In addition, when y'all mix and lucifer colors and patterns they expect a niggling cuter than a obviously t-shirt.

In today's post I'll show y'all how to draft your ain raglan tee pattern in whatsoever size, and so I'll bear witness you how fast and piece of cake information technology is to sew ane upwardly.

How to make your own raglan sleeve pattern
Once your blueprint is all fix and you've made ane shirt and then you're familiar with the process, you tin whip out additional tops in virtually 45 minutes each. Raglans for younger kids are a great fashion to apply up scraps of textile left over from other projects.
To draft your ain pattern, y'all'll need a t-shirt that fits your child well. Don't make the mistake of grabbing a t-shirt from concluding year – you'll finish upwardly with a shirt that doesn't fit! Not that I've e'er done that before…
I like to use freezer paper to trace patterns – it'due south inexpensive and comes in rolls that are broad enough for almost whatever child'southward design piece.

Place your t-shirt on the freezer paper, with the directly edge of the paper going through the exact middle of the shirt. Trace around the shirt equally you can come across in the photo higher up. For the sleeve, yous want a straight line from the neckline down over the shoulder. I fabricated the sleeve opening on my pattern a little larger than the 1 on my t-shirt considering the t-shirt I was using had a gathered sleeve.
In one case you move the t-shirt, yous'll have a basic shirt outline, like the 1 you run across below. Depict a slightly lower neckline curve for the front of the shirt. Also draw a straight line from the armpit to the neckline, equally yous come across below.

Cut the design piece out, and cut it apart at the armpit-neck line (1st photograph beneath). The adjacent step is optional, only I recollect it gives the shirt a lilliputian amend fit. Cut a very slight bend into the line where you lot just cut the 2 pieces apart – yous only need to accept about 1/4 inch out of each pattern slice. It should await like the 2nd photograph below.

Now we're going to retrace each of our two blueprint pieces, this time adding whatever seam allowance and hem allowance you like to sew with. (Y'all tin run into that I didn't add seam allowance at the neckline, but I should take!) Remember to transfer the front neckline markings onto your new blueprint pieces. Cut them out, and throw the old ones abroad so you don't go mixed up!

Just ane more quick pace to finish the pattern: right at present the sleeve piece would accept to exist cut on the fold. Trace around the sleeve pattern piece, then flip it over and trace around it again to get a full design piece. On one side of this pattern piece you'll trace the back neckline (college) and on the other side you'll trace the forepart neckline (lower). Exist sure to add together a little room for a hem if you haven't done so already.

How to sew together a raglan sleeve shirt
Ok, at present you can cut out your fabric. Cutting one front and ane back bodice piece ON THE FOLD, every bit shown below. Remember, the back piece will have a higher neckline. Cut ii sleeve pieces. (You must utilise knit fabric, which is stretchy. The stretch should go side to side on all pieces.)

Alright, the hard function's washed! This shirt sews upwards extremely apace. Offset by unfolding the back bodice and laying it downward on a table. Grab ane of your sleeve pieces and lay in on top of the bodice, correct sides together, equally shown (make sure y'all're using the taller side of the sleeve here). Sew together as shown.

Repeat with the other sleeve on the other side. Your shirt will look like this:

Next you want to match up the forepart bodice with the front (shorter) sides of each sleeve and sew them, again right sides together.
Once the sleeves are fastened, y'all can pin and sew the side seams:

Commencement at the bottom of the sleeves, run up up and nether the arm, then back down the side. I like to give the fabric a gentle stretch as I'yard sewing nether the arm to make sure this seam won't pop when the kid lifts her arms.
Turn the shirt right side out, and it looks similar this:

And then you merely need to finish the neckline as desired and hem the shirt and sleeves. My favorite method for finishing necklines on t-shirts can exist found in the original like shooting fish in a barrel tee post.
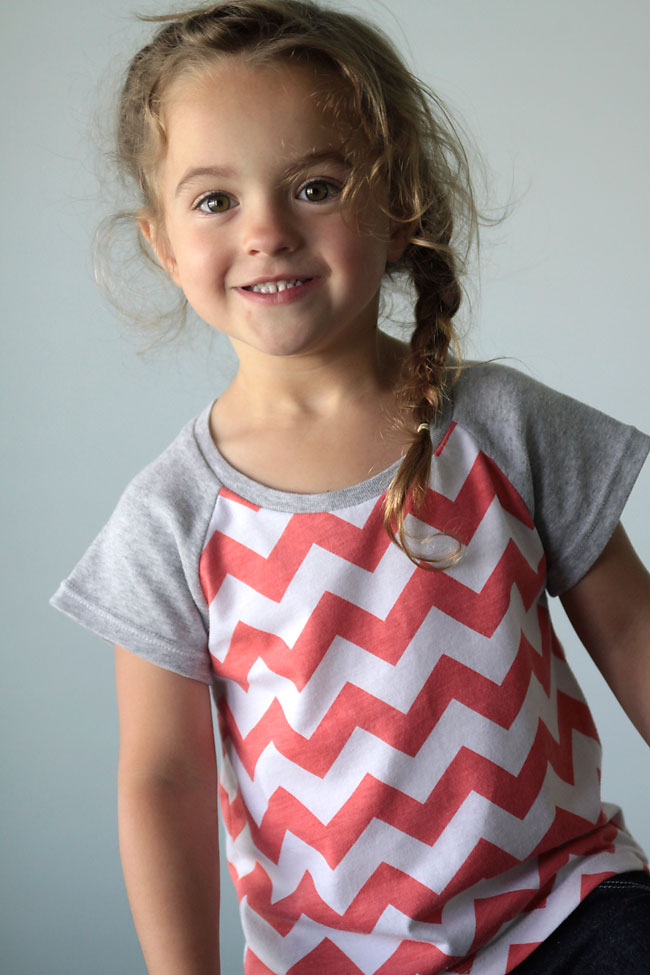
Here's what the finished shirt looks like:

(Yep, the sleeves are suddenly a dissimilar color 🙂 I simply didn't like how the matching coral colour looked on the sleeves, so I took them out and added greyness ones instead.)

For more raglan sleeve sewing projects, visit this post:
Costless pattern for women's raglan sleeve tee
Girls' raglan sleeve (baseball sleeve) play all day clothes
Women'south palpitate sleeve raglan
Long sleeve raglan sweatshirt for women
chamberlainevending.blogspot.com
Source: https://www.itsalwaysautumn.com/draft-sew-raglan-tee-pattern-size.html
0 Response to "how to pattern draft and sew a raglan tee in any size"
Post a Comment